Building Consistent AI Video: A Storyboard-First Workflow
Faces drift, outfits mutate, and characters multiply across cuts. Here's a hybrid Wan 2.2 + LTX 2.3 workflow that locks character identity from storyboard to final render — with ID-LoRA lip sync.
AI-assisted draft. Reviewed and edited by the Phosphene team before publication.
On this page
- Why a single model isn't enough
- The storyboard-first principle
- Step 1: Design your key frames as stills
- Step 2: Establish a multi-reference relay
- Step 3: Route clips by model
- Step 4: Lip sync with ID-LoRA
- Cost management across a full sequence
- Handling drift when it happens
- What this means for your workflow
You start with a perfect opening shot. Your character looks exactly right — the hair, the eyes, the jacket. Then you generate cut two from a different angle and the face is subtly wrong. By cut five, it's a different person entirely. Sound familiar?
This is the consistency collapse problem, and it's the single most frustrating wall in AI video. A Japanese workflow by AI creator Ai-Hakase tackles it head-on with a hybrid pipeline combining Wan 2.2 and LTX 2.3 — two video models with complementary strengths — plus ID-LoRA for lip-sync fidelity. The approach isn't about finding one perfect model. It's about structuring your pipeline so the models never get the chance to drift.
Why a single model isn't enough
Different video models have different failure modes. Wan 2.2 excels at maintaining character identity across frames — faces hold together, clothing details survive cuts. LTX 2.3 brings speed and temporal fluidity, generating smooth motion at a fraction of the compute cost. Used alone, each has a weakness: Wan can be slow and expensive for iterating; LTX can let identity slip on longer generations.
The hybrid approach uses each model for what it does best. Wan handles the identity-critical frames — close-ups, key shots where the face must be perfect. LTX fills in the motion-heavy connective tissue where smoothness matters more than pixel-perfect identity.
This mirrors a principle from traditional animation: not every frame needs to be a key frame. You invest your budget where the audience is looking.
The storyboard-first principle
The biggest mistake in AI video is generating clips sequentially — shot one, then shot two, then shot three — and hoping consistency holds. It won't. Instead, plan every key frame as a static image before any video generation begins.
Step 1: Design your key frames as stills
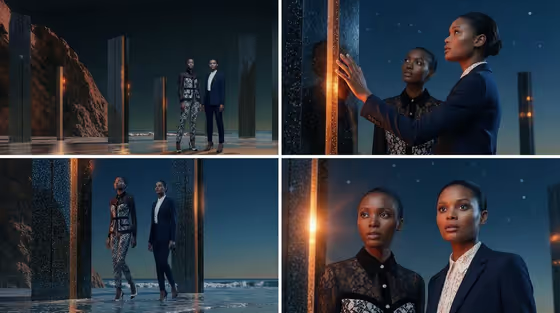
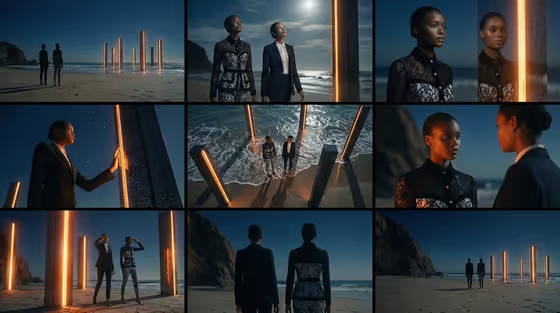
Generate 4–8 key frame images that represent the most important moments in your sequence. These are the frames where character identity must be unambiguous — typically close-ups, dialogue shots, and establishing frames for each scene.
For each key frame, lock these elements:
- Full character description — hair color and style, eye color, skin tone, build, clothing layers, accessories
- Camera angle — close-up, medium shot, wide
- Lighting and environment — this stays consistent across all frames in the same scene
- Expression — match the emotional beat of the moment
In Phosphene, build these as layered compositions. Set your character tags once, then generate each key frame by swapping only the camera, expression, and environment tags. The tag system ensures that changing the expression doesn't accidentally alter the wardrobe or hair color — which is exactly the kind of drift that kills consistency downstream.
Step 2: Establish a multi-reference relay
Once your key frames are locked, you don't feed them into a video model one at a time. You use a prompt relay — a technique where each new generation receives multiple reference images from the key frame set.
The relay works like this:
- Generate the first video clip using key frame 1 as the primary reference
- Take a clean still from the end of clip 1
- Feed that still plus key frame 2 as dual references for clip 2
- Repeat — each clip inherits identity from both the original key frame and the previous clip's output
This creates a chain of visual continuity. The model never has to invent the character from a text prompt alone — it always has hard visual references constraining its output.
Step 3: Route clips by model
With references established, assign each clip to the right model:
- Identity-critical clips (close-ups, dialogue, hero shots) → Wan 2.2 with multi-reference input
- Motion clips (walks, pans, environmental transitions) → LTX 2.3 for speed and fluidity
The cost difference is significant. If everything goes through the slower, more expensive model, a 30-second sequence can burn through credits fast. By routing only the shots that need identity precision to the heavier model, you keep quality high and costs manageable.
Step 4: Lip sync with ID-LoRA
For dialogue or music sequences, lip sync is where most workflows fall apart. The mouth moves, but it doesn't match the audio — or worse, the face distorts during phoneme generation.
ID-LoRA addresses this by training a lightweight adapter on your specific character's face. Instead of the video model guessing how your character's mouth should form each sound, the LoRA provides a learned facial identity that stays stable through lip-sync animation.
The workflow:
- Generate or obtain your dialogue audio track first
- Apply the ID-LoRA to your video model as an adapter layer
- Feed the audio as a reference alongside your visual references
- The model syncs mouth movement to the audio while the LoRA prevents facial drift
The result is lip sync that feels intentional rather than mechanical. The character's face holds its identity even through rapid dialogue, because the LoRA is enforcing structural continuity at the adapter level.
Cost management across a full sequence
A complete scene — say, 20–30 seconds of narrative video with dialogue — involves a lot of generation. Here's how to keep it sustainable:
| Component | Model | Strategy |
|---|---|---|
| Key frames | Image model | Generate 4–8 stills, iterate until perfect |
| Hero clips | Wan 2.2 | Reserve for identity-critical shots only |
| Motion clips | LTX 2.3 | Use for transitions and ambient motion |
| Lip sync | ID-LoRA adapter | Apply only to dialogue clips |
| Audio | TTS or music model | Generate first, use as input reference |
The biggest cost trap is regeneration cycles. If your key frames aren't right, every downstream clip inherits the problem. Spend the time — and the credits — getting your static references perfect before touching a video model. One hour of image iteration saves five hours of video regeneration.
Handling drift when it happens
Even with this pipeline, minor drift creeps in. Here's what to do:
- Face shifts between cuts → Re-extract a still from the problem clip, compare it to your key frame, and regenerate using both as references
- Clothing details mutate → Your key frame likely didn't specify the detail tightly enough. Go back and regenerate the key frame with more explicit wardrobe tags before redoing the video clip
- Duplicate characters appear → This happens when the model interpolates between two references and averages them. Ensure your reference set shows the same character, not lookalikes, and explicitly state "single character" in the prompt
What this means for your workflow
The storyboard-first approach flips the typical AI video process on its head. Instead of generating clips and fixing inconsistency after the fact, you build consistency into the foundation. Key frames become the contract — every video clip is constrained by visual references that leave no room for the model to hallucinate a different character.
This is also why tools that make image generation precise and repeatable matter for video work. A tag-based system where you can lock character attributes independently — hair, wardrobe, build, expression — produces cleaner key frames. And cleaner key frames produce cleaner video.
Start in Phosphene: design your key frame set using layered character tags, export the best stills as references, then feed them into your video pipeline with multi-reference relay. The storyboard you build here is the backbone of every clip that follows.
From guide to canvas
Try the idea, not just the prompt
Open a guided starting point, add your material, and shape the result from there.